Carleton Brown shares the story behind the restoration of Rose, an original World War Two Austin Tilly
‘I managed to make my first planned show of the vehicle at The Thames Traditional Boat Rally’
Back in 2013, I had not long finished restoring my 1943 Willys Jeep and I knew that I wanted to do a British vehicle next – something small but iconic, that could fit in a garage and was not too thirsty on petrol. Looking around for various options, most seemed too big for what I wanted – but I soon realised the Tilly fitted the bill perfectly and was likewise very practical.
I joined the Tilly club, which has been immensely helpful and a great resource for information. The club’s records show that from 1959-1961 some enterprising gentlemen shipped as many Austin Tilly as they could find to Malta. These were snapped up by market gardeners, builders and countless other small businesses as useful pick-up vehicles.
While most were worked to death, some survived and Malta swiftly became the most populated Austin Tilly location anywhere. I was fortunate enough to find two for sale and flew out to Malta to view them. I purchased both and shipped them home through Italy and France – ultimately keeping one for restoration, and selling the other to a friend.
Since then, general interest in Tillys has exploded, and they are now extremely hard to find for sale in Malta, or anywhere else. It is also worth noting that Tillys are now, as of 2022, roughly equivalent to Jeep prices.
I never dreamed that it would take so long to restore the Tilly, but life ultimately gets in the way – my beautiful daughter was born, and house and car-related distractions further slowed things down. Likewise, restoring a car in a single garage with no proper heating and very minimal working space was extremely challenging.
Once the vehicle arrived, I immediately started stripping the Tilly, but it quickly became apparent how much work was needed. Once it was completely taken apart, I created a mental shopping list of parts I would need.
Fortunately, the four different Tilly types are based on contemporary cars of the day, so I bought an Austin Ten as a donor vehicle for small parts and countless Whitworth bolts. Other parts were sourced from another very rusty donor Tilly.
I compartmentalise my restorations, and will often run multiple jobs concurrently to keep my motivation high and things moving along. Therefore, I break the vehicle down into groups, in this case, chassis/suspension, front bodywork, rear bodywork, engine and mechanicals, and interior and electrics. I focus on these groups, but will often run three or four jobs alongside each other, so if one stops I keep working on the others and go back to it.
The first thing to work on was the chassis, which had rust patches and some bodged alterations, but after several hours of work, I was able to create a solid platform. One frustrating issue I faced at this stage was the very thin gauge of steel of the chassis, so had to be careful not to blow through it when welding. Unfortunately, I did so many times – adding many hours of work onto the project.
The next stage of the project was the most challenging, and likewise the most time-consuming; involving the bulkhead, B pillars, roof and doors.
I first however had to fix the rust and other various issues – the roof section of the vehicle ultimately hanging from my garage ceiling, waiting to be worked on, for four years. Rust had severely weakened the B pillars and a previous owner had done a very poor job repairing them with angle irons.
All of the pillars thus had to be unpicked and refabricated, which was very timeconsuming. I strive to improve and enhance original vehicles, as long as the work is not obvious and can easily be reversed.
So, in the case of the B pillars, I chose to weld them to the chassis internally, with thicker steel section reinforcement instead of the original wood reinforcement. The doors were very rusty and dented and tended to swing too far open in the wind and slam against the rear body, which was something I fixed with large leather check straps.
The roof section is a split cab-type, enabling easy transportation. Fortunately, it was also rust-free and very solid – even having its original wood inserts in the channels, which I kept. The bulkhead needed numerous rust repairs and minor fixes, particularly where the mud traps were behind the front wings. Once this, the doors, and the B pillars were done over five years, I could ultimately pull them all together.
‘I had put off doing the electrics for a long time, as it’s a job I don’t particularly enjoy doing and seem to have lots of issues with’
During this period I was doing countless other jobs like fabricating new parts and restoring old ones. Many hours were spent on the bench grinder with a wire wheel, cleaning off bolts and other pieces, then rustproofing them with red oxide spray before storing them on the shelf ready for use.
Examples of fabricated new parts were the brackets and rope hooks that run down the side of the rear body; I only had about two-thirds of the original set, so new ones had to be made from scratch.
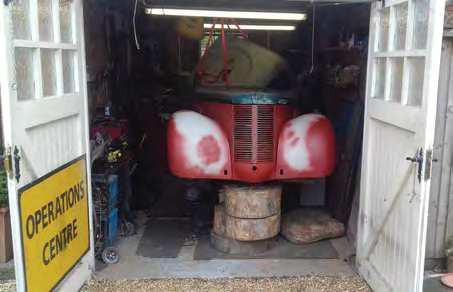
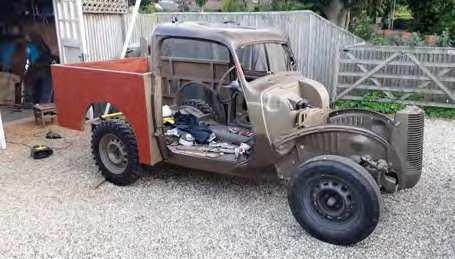
Next, I repaired the front wings and grille panel and then did a test fit with the bonnet. This was a particularly exciting moment, as for the first time in five years it looked like a car again. Shortly after, I moved the project to a carport on the other side of my house, where I fortunately now had more space to move around the vehicle.
Work continued whenever I had spare time – taking the project up to January 2020. I had been working on getting sheet steel parts folded for the rear and front body build, and these were waiting in the shed.
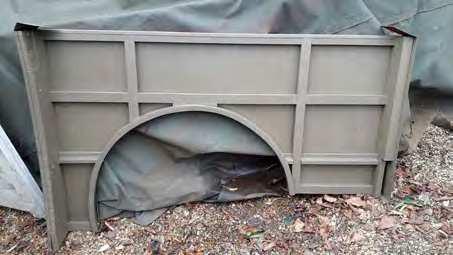
Like many British World War Two vehicles, parts of the Tilly are wooden – for example. the rear body is a series of wood sections glued and nailed together to form a strong floor and body sides. I used seasoned ash wood from a local supplier to restore these parts of the vehicle.
The woodwork itself was not overly challenging, except for getting it tightly aligned and square. The cutting of joints for the body sides was one job I asked a friend to help with, as he has excellent woodworking skills, and it enabled me to focus on progressing to other jobs.
My dear departed friend Rodney Rushton made the curved wooden wheel arch pieces that go on the inside of the wheel spats. Tilly floors often rust badly, because water passes through their wooden floors and sits in the tray-shaped chassis beneath.
To combat this, and also create some useful storage space, I made the rear floor sections removable. Once I had finally assembled all of the rear body and then covered it in sheet metal, it was clear I was making progress. During this time, I had the rear metal storage lockers folded in the Netherlands as part of a trade deal, and these were fitted next.
I had some original front seats but their backs were in a very poor state. I spent many hours welding them back to something solid, and inserting new metal where necessary.
Similarly, the rear wheel arch spats took many hours to get back to normal, and the uniquely shaped fuel filler housing needed a fair amount of welding and fettling to fit.
Having painted my wheels, I fitted Deestone Extra Traction tyres all around. The Tilly wheels (on the Austin at least) are an inch wider than the car, so I was pleased to have access to four that were not buckled.
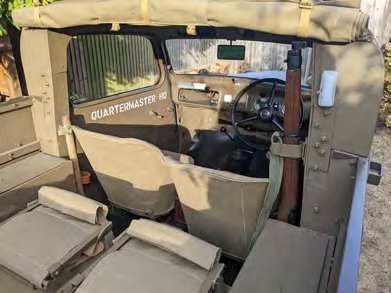
During the entire process, I tried to save jobs that I could do inside the house, in my utility area, for winter – to keep up the progress. Therefore, over winter 2021 I assembled the rear seats. These had a wooden base with a metal frame that hinged over to create a loading platform when not in use. I modified mine to have foam under the canvas, to be more comfortable and take the strain from pulling the canvas against the frame.
I then started looking at the engine. I had purchased five in total over the years and chose the best two – sending them to my machine shop of choice (CK Motor Engineers in High Wycombe) for assessment. The best out of the two having been chosen, I then gave it a thorough internal hot wash and jetted out the oil pathways.
The engine build went smoothly through the winter – opting to have a lightened flywheel for better pick up, plus a cam reprofile, larger downdraft carb and dry air filter for further performance gain. I also ported the manifold and inlets for a smoother fuel transition.
I had put off doing the electrics for a long time, as it’s a job I don’t particularly enjoy doing and seem to have lots of issues with. Starting this, my biggest problem was that the loom I had bought from Autosparks, almost eight years prior, was for a WD Van. The layout was essentially the same, but the colours were slightly different.
So, I ended up using two wiring diagrams and a loom that didn’t quite match either and got there eventually. As I did with my 1943 Willys Jeep, I fitted headlight bowls that had an internal sidelight bulb and placed indicators in the sidelight pods. The rear lights were the most minimalist, lowmounted, round LED units I could find – as in my opinion round lights always look better on wartime vehicles.
I used Frank Brown for the canvas work, as he does British vehicles and accessories which most of the larger companies don’t; and I was ultimately very pleased with his quality work on the roof, seats and fume curtain.
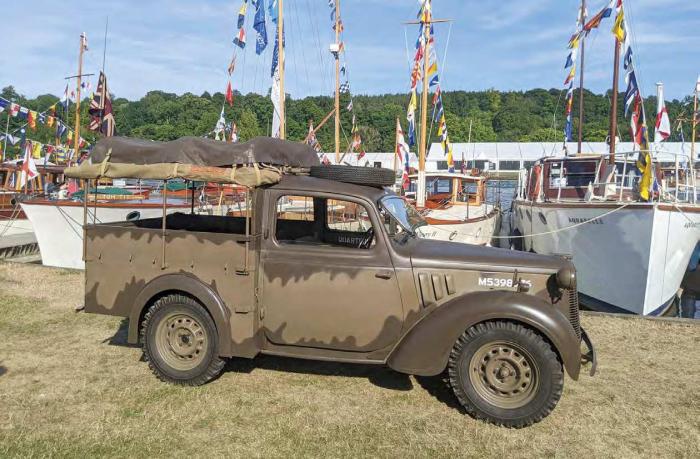
I opted for some minor modifications, the main one being the ability to roll up the sides of the roof. As I had previously found with my Land Rover Wolf, this modification gives more internal light, excellent visibility, better air flow and most importantly looks great.
In the summer of 2021, I took a week off work, and this, fortunately, coincided perfectly with a spell of very hot weather – so I sprayed the whole vehicle on my driveway and in my back garden over five days. Despite some other delays I set a target to finish the car by summer 2022, as things were otherwise progressing well.
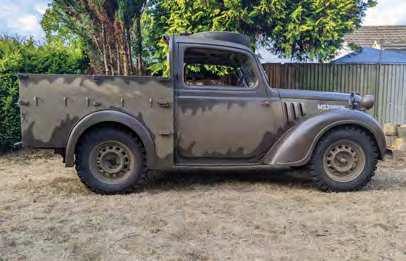
Without a doubt, the most asked question I had about the restoration project was about the camouflage scheme. Having done much research over several years, pouring over countless contemporary photos, and reading Michael Shackleton’s excellent book Tilly Colours, I knew several things. Firstly, I knew I didn’t want a green vehicle, as brown shades were equally as common during the early/ mid-war, and to be historically accurate, green wasn’t widely used as strong pigments weren’t readily available.
‘General interest in Tillys has exploded, and they are now extremely hard to find for sale in Malta, or anywhere else’
Likewise, I didn’t want a Mickey Mouse camo scheme; although there was nothing wrong with such a design, I felt it had been replicated many times before by other restorationists. Lastly, and most importantly, I wanted a British scheme that was officially used – so I found a copy of a Military Training Pamphlet, MTP46/4A, and chose the Foliage scheme from the options listed within.
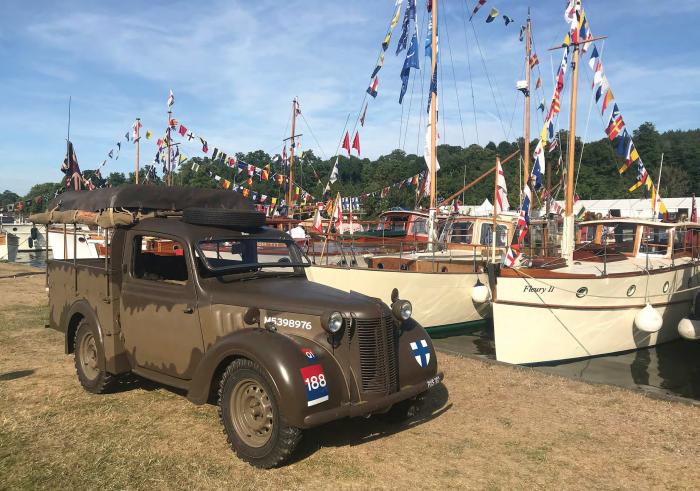
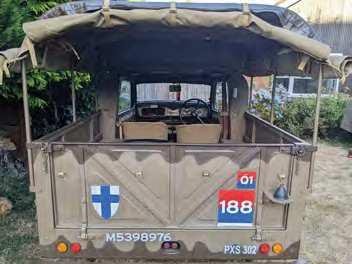
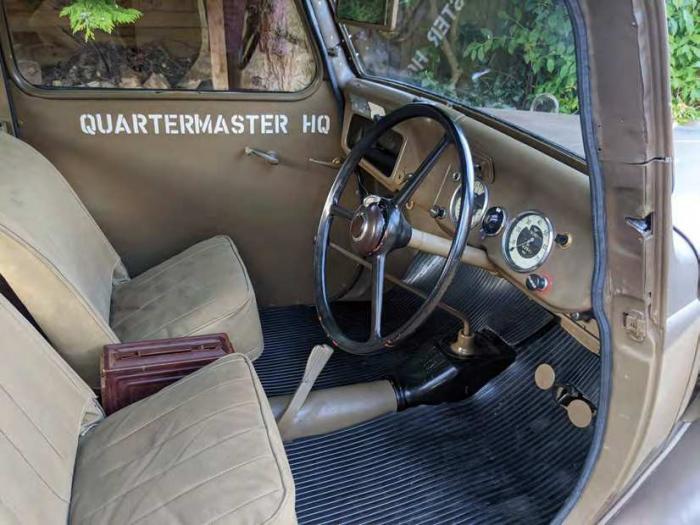
My grandfather served in the Royal Artillery in World War Two as a gunner and driver, so I have always had an interest in this area. Thus the markings on my Tilly are Royal Artillery 8th AGRA (21st Army Group), designating it as an HQ quartermaster vehicle, which was based in part on an original photo I had found.
I had originally planned to do the markings of a battery quartermaster sergeant but contemporarily they had used a three-tonne truck, and as such my markings would not have been historically accurate.
I managed to find the Malta logbook for the vehicle, which shows it was originally first registered in February 1947 – so I believe it is highly likely it was present in Malta during the war itself. The seller told me that after the war it spent time as a taxi, before being used as a florist’s van for the rest of its life, which is why I have fittingly named it Rose.
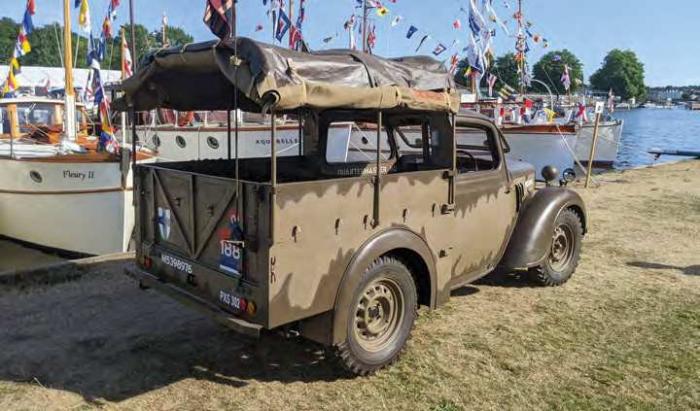
I managed to make my first planned show of the vehicle at The Thames Traditional Boat Rally, where it fittingly stood in front of a selection of Dunkirk Little Ships. A day before this show, I did the very last job just in the nick of time – finishing the restoration project. This involved bolting a lockable .30 calibre ammunition tin between the two front seats, which gives me access to hidden power sockets, storage for glasses and my mobile phone, and a place to stand a bottle of water.
The ammo tin is very practical and useful while looking perfect and historically accurate – exactly like the original design concept of the Austin some 80 years earlier.