
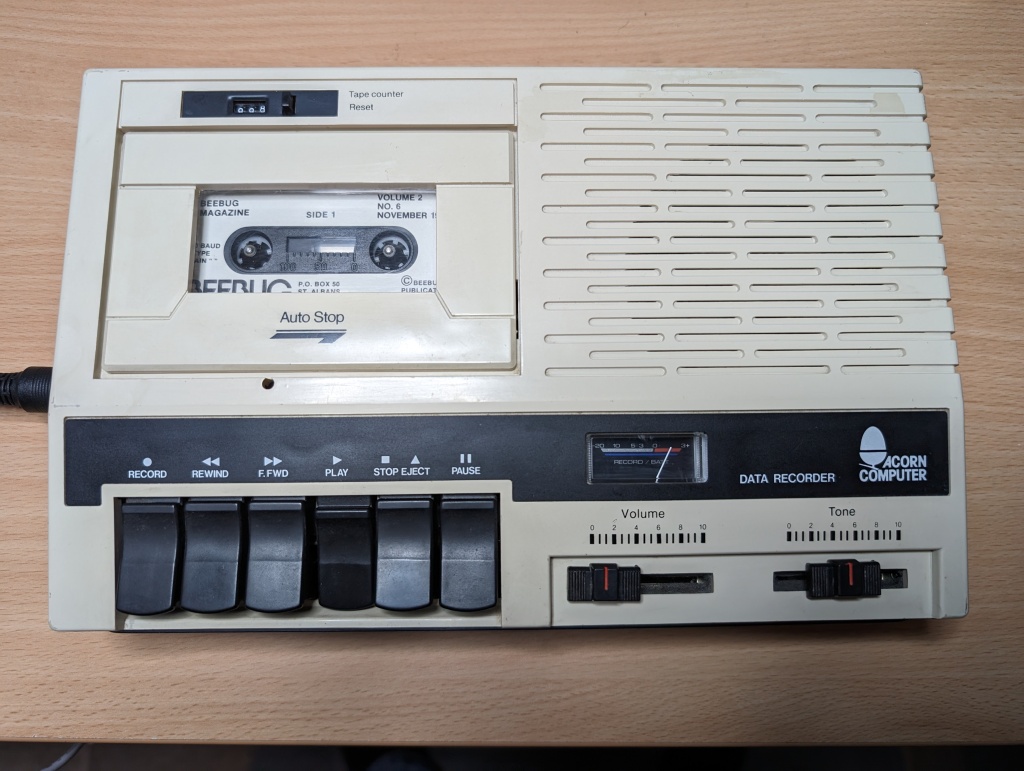
For BBC Micro owners in the 1980s, a disk drive and DFS upgrade was often financially out of reach, sometimes costing nearly as much as the computer itself. This was the case for me as a child, instead we had the ANF03 Data Recorder to use cassette tapes instead.
The ANF03
This is the ANF03 I recently acquired. It is quite dusty and dirty, and I’m told rewind doesn’t work properly. Which I’m pretty sure is due to failing rubber belts. I’m not even going to try it until I’ve cleaned it up and replaced the belts, as I do not want to damage a cassette tape.

I’m not sure exactly who built these tape machines, but several companies had their own brand versions of the same machine. There was a Dixons branded one with the model number TR30 that was silver, for example. The largest changes typically being an addition of a microphone where the Acorn logo is, and normal audio ports.
The Acorn variant uses a DIN cable to connect between this machine and a BBC computer. The DIN cable contains the earphone, microphone and remote signals in it. For those who don’t know, many cassette machines aimed at computers at the time had a signal called “remote”, and this was a signal from the computer to start and stop the tape playing. So, the computer will only let the tape play when it is ready to hear it.

Despite the controls on the top, the ANF03 has the volume perfectly tuned on the DIN socket for the BBC. The volume control at the top is only for monitoring the output sound via the speaker.
The machine can be powered either by 4x C-cell batteries or a C7 power cable, often called a “radio power cable” or “figure of eight” here in the UK. It even has a retractable black bar to use as a carry handle. I’m not sure if anyone ever used this as it would normally sit on the desk tethered to your BBC.

Restoration
There are supposed to be 5 screws holding the bottom on, one in the battery door, but for some reason, mine is missing one. The shell then easily comes apart.
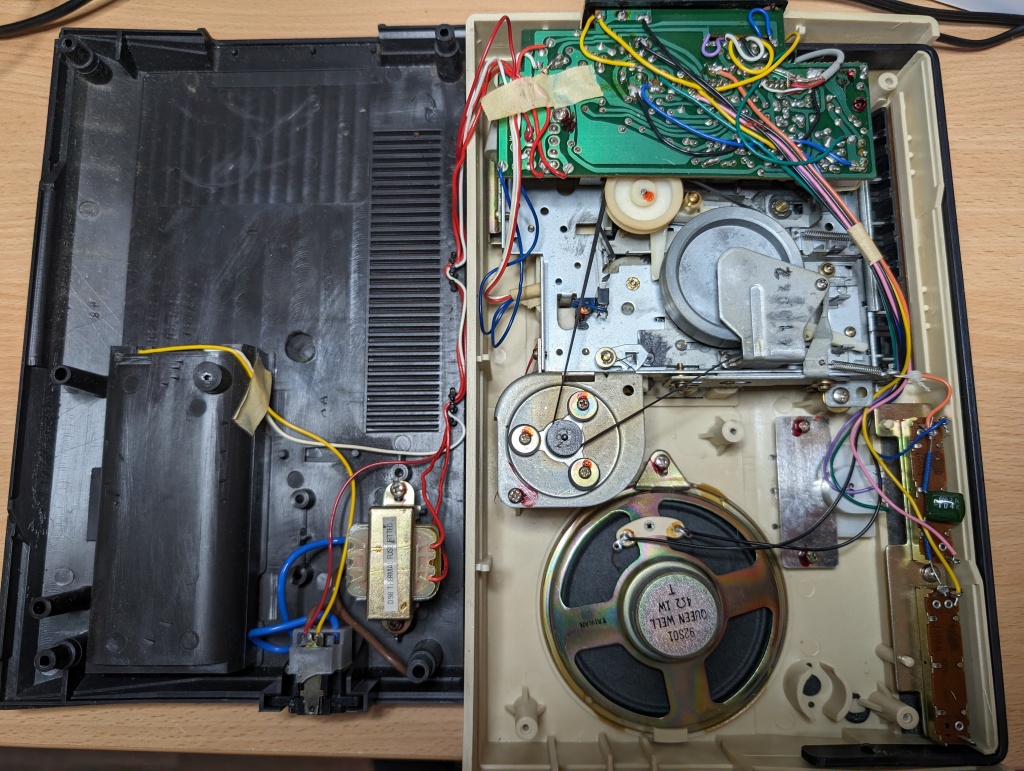
Here you can see the main belt connecting the motor to the tape mechanism. This belt feels a little too soft and not very well tensioned. This will definitely be replaced.
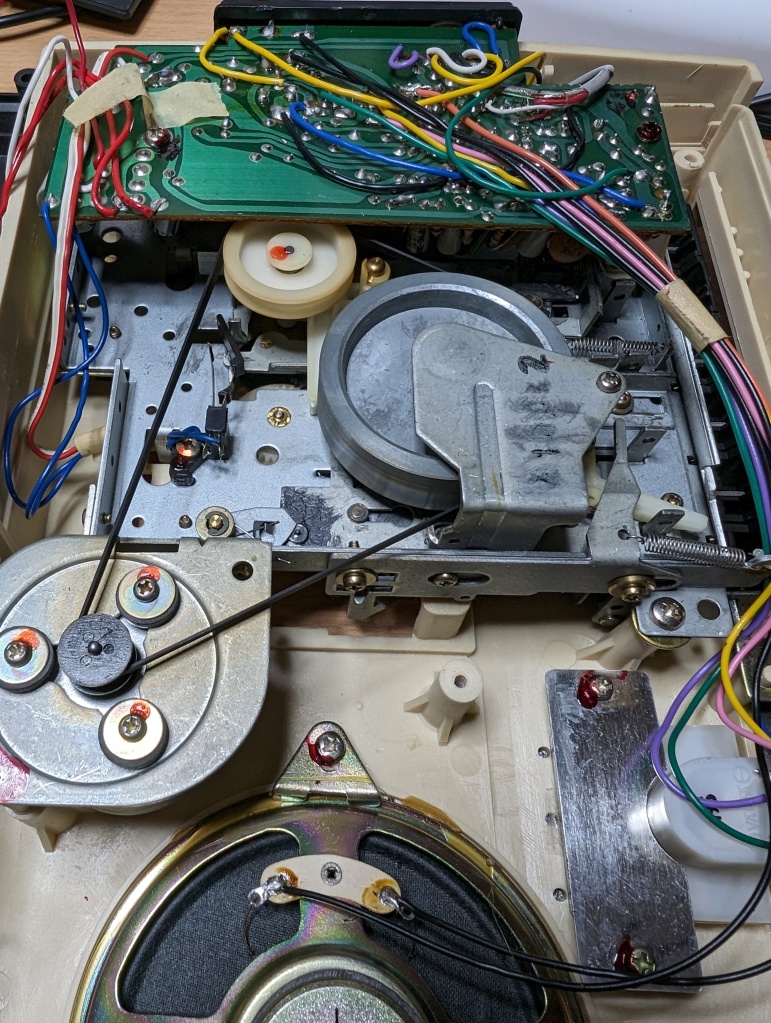
I removed the tape door, which can be done by pushing in the two sides of the door and opening it further. Four further screws allows us to remove the tape mechanism, the motor is still attached to the mechanism, and we can flip it over to see the underside.

Here we can see a further belt for the tape counter. Like the other one, this doesn’t feel well tensioned and should be replaced. We can also see some of the dust here, it is worse than it looks here, though.
I removed the speaker and controls from the top shell and gave it a good clean with a plastic cleaner and a toothbrush. I also cleaned out the tape mechanism with my CompuCleaner and some isopropyl and cotton buds.


Despite some scuff marks, it is looking a lot better already. I also sprayed the parts of the metal handle that touched the plastic casing with silicone spray, as it was sticking a bit. That made a massive improvement, a much smoother operation.
Fan fact: when I was a teenager, I used to design and manufacture high-end curtain tracks for bay windows. A light dusting of silicone spray makes the runners move through the tracks a lot smoother, just be careful not to get it on the curtain fabrics.
I acquired a belt set from Dataserve Retro, and replaced the originals with these.

After this, I started putting it all back together again.
Testing
I put in four C-cell batteries, and tested the fast forward, play and rewind buttons. The rewind was not working unless you held it down beyond the latch. This isn’t a blocker to continue testing, so I popped in a Beebug tape I had lying around and attempted to load it.
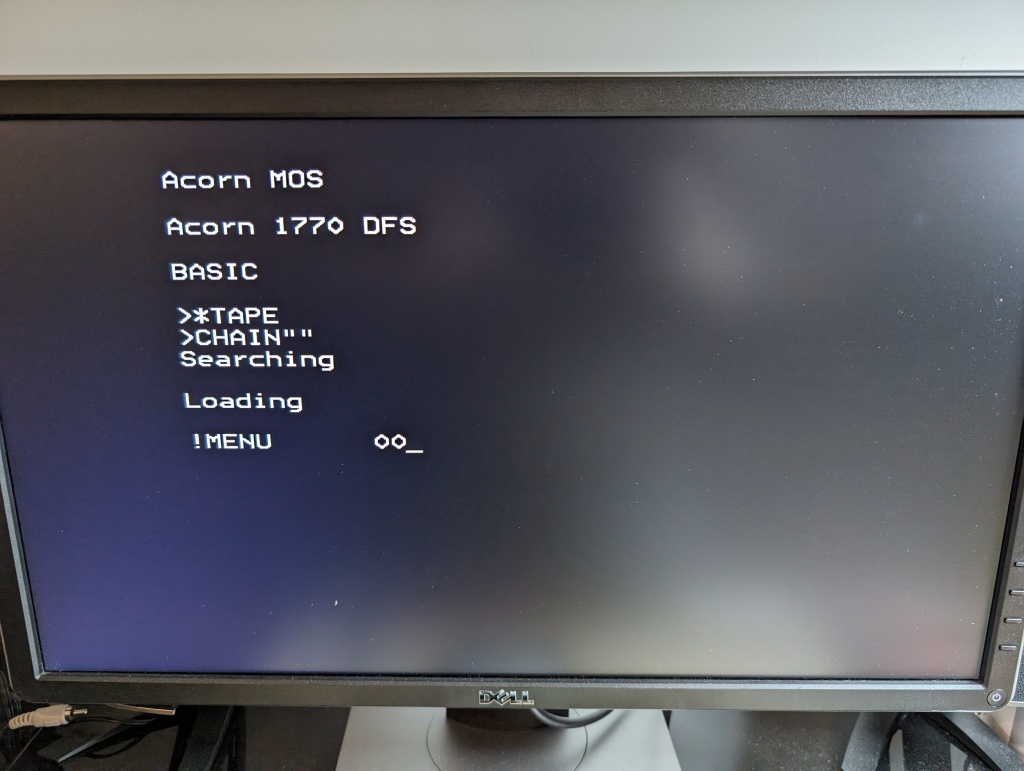


It seems to work! And I got the lovely screechy loading sounds that would bring anyone my age back to their youth. If you want to hear what it sounds like, there is a virtual BBC tape player which you can hook right up to the BBC. Here it is with the game Crazee Rider.
Fixing Rewind
I opened up the machine again to see if I could figure out why rewind wasn’t working. I noticed that when the buttons were pressed, two contacts would touch together, but they just miss each other on rewind. Here is what it looks like with the rewind button latched.

I bent the rear contact ever so slightly so it was straighter and after that, all the buttons worked correctly, including rewind.
Conclusion
After this, I screwed it all back together again, I found that an M3 self-tapping 18mm screw is a great replacement for the missing one, the thread is identical.

And with that, I leave you with a before and after shot of this Acorn ANF03. Now I just need some more cassette tapes!


Leave a comment